“Marriage requires falling in love many times…Always with the same person”
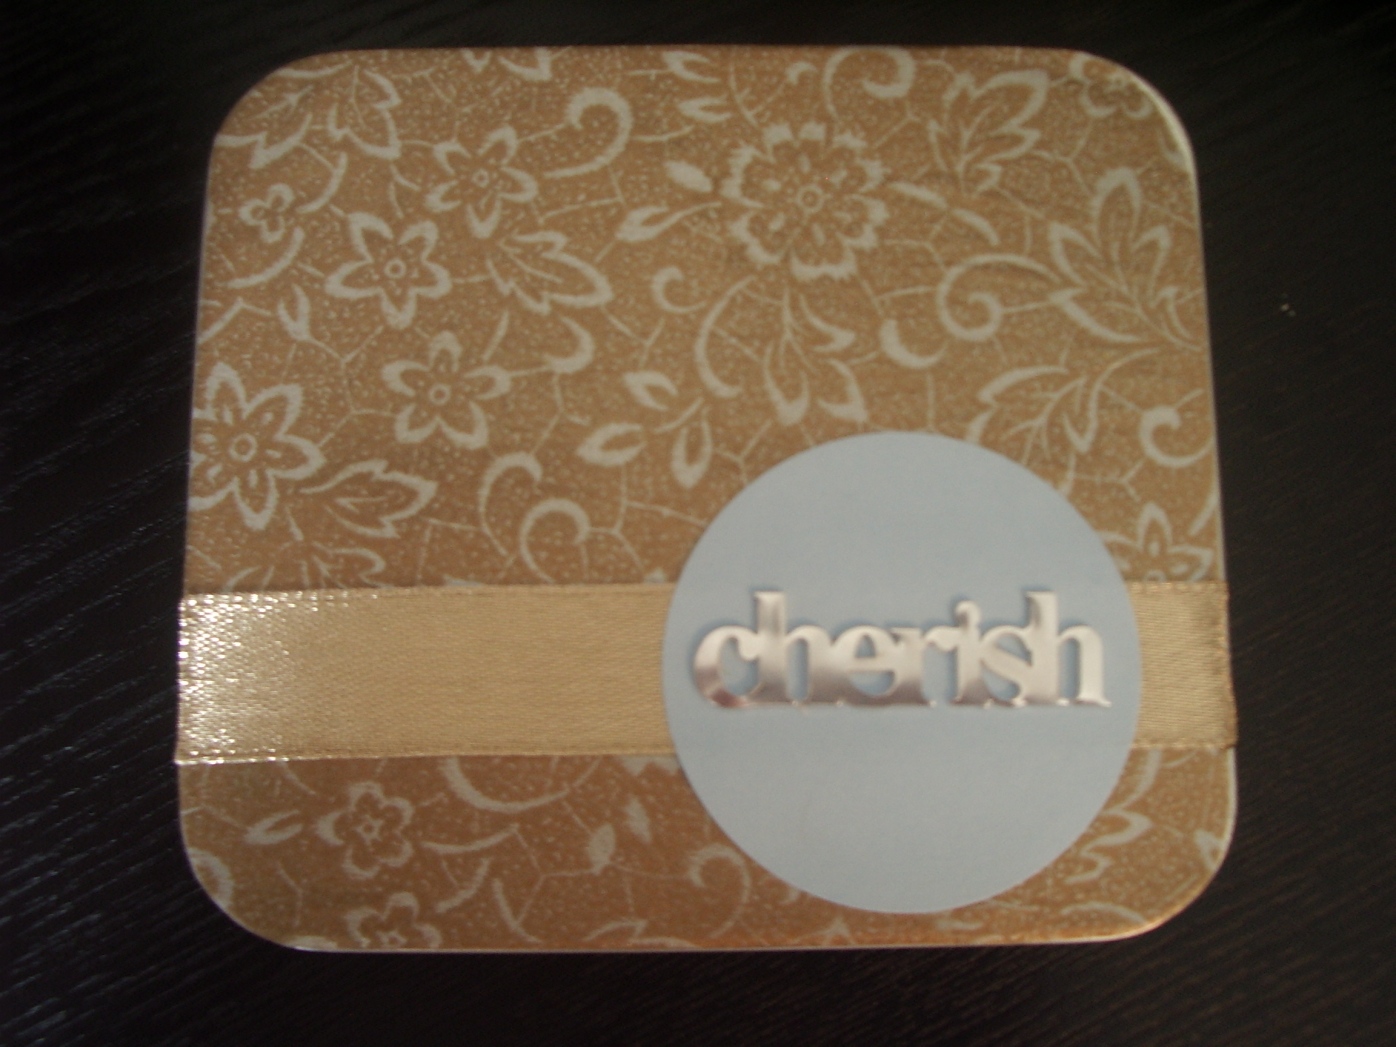
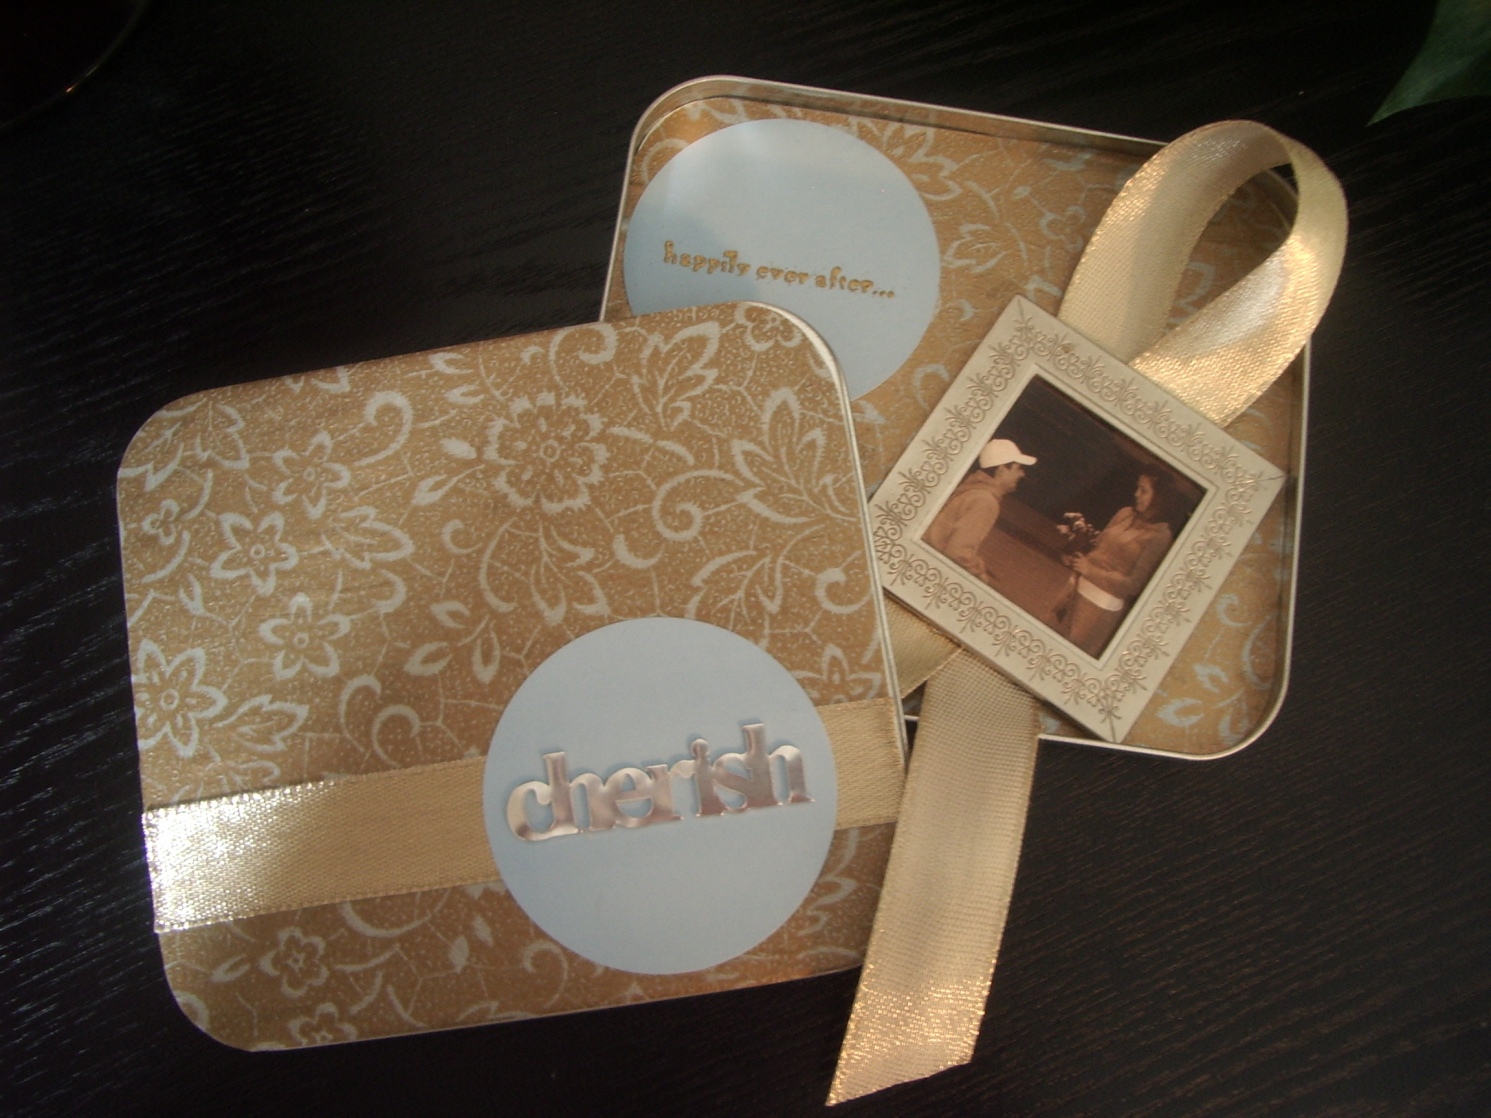
Ok – this is one of my favorite projects lately. It really did turn out beautiful. This creative handmade picture ornament is for a wedding gift for our friends. It has two different purposes. First, since they are having a winter wedding I decided it would be nice to make them a Christmas ornament for their first Christmas tree together. And second, I put a magnet on the back so if they want to enjoy it all year round they can put it on their refrigerator. The magnet also has another purpose… of course! It holds the actual ornament in place since the container is a tin. Ok …this is how we did it.
You’ll need: your favorite paper, tin, ribbon, circle stickers, frame embellishment, stick-on magnet, and any other embellishments, glitter, etc that you might use. I found everything at a Seattle boutique last time I was home called Packaging Specialties. It is an absolutely wondeful store and I wish I had one where I live now.
1. Find some paper and embellishments you love. I’ve had this beautiful gold and baby blue paper forever waiting for the right project and I finally found it!
2. Using a plain piece of card stock I traced the bottom of the tin for a template. I cut out the template and placed it inside the tin to make sure it was the correct size.
3. Take the template, trace, and cut out two of them on your favorite paper. ( You could skip the template part if you’re only making one, but since I am going to make some for Christmas gifts I decided to use a template to save me time)
4. Mod Podge one piece of paper to the inside of the bottom part of the tin. Set aside and let dry. Mod Podge the second piece of paper to the top outer part and set aside to dry.
5. Find a ribbon that compliments your design, cut to size, and attach to top of tin. Do another layer of ModPodge and let dry.
6. Take your circle sticker and stick it on top of the ribbon once the Mod Podge has dried.
7. Place an embellishment in the middle of the circle. You could also run the stickers through the printer and make your own design if you are savvy with the computer.
8. On the inside sticker I used a stamp, embossing ink & powder, and an embossing heater to get the raised gold look of “happily ever after…”. Again, you could use your computer or any embellishment there as well.
9. Find your favorite photo. Size to fit inside the frame embellishment (these can be found in your scrapbook embellishments section at your craft store).
10. Tape the photo to the mini-frame on the back.
11. Take your ribbon that matches the front and glue it to the frame.
12. Then take a magnet and cut it to size. I bought some that are business card size and you just remove the protective sticker and then stick it to your item. They worked great!
13. Put your ornament into the tin and the magnet will keep it in place.
14. Voila! All done.
I love this idea because you could use it for almost anything. For a baby gift or a baby announcement, you could put their picture in it and then on the inside circle sticker you could put their birth weight, height, etc. This would also be a beatiful and unique wedding favor that would have all your guests talking. So have fun with this one….
Be inspired, get creative, and have fun!


